As a system administrator, you are probably already familiar with the LDAP protocol.
If you are working in a medium to large company, you can be sure that your company already owns a LDAP server, whether it is on Linux or Windows.
Invented in the early 80s, the LDAP protocol (for Lightweight Directory Access Protocol) was created in order to store data that should be accessed over a network.
The LDAP protocol was defined as part of the RFC 4511 specification and it was implemented by many different vendors.
In this tutorial, we are taking a look at one of the implementations of the LDAP protocol : OpenLDAP.
OpenLDAP is a free and open-source implementation of LDAP that provides a server (called slapd) as well as utilities and libraries for developers.
Using this tutorial, you will be able to setup a complete OpenLDAP server and configure it in order to use it for central authentication.
- How To Search LDAP using ldapsearch (With Examples)
- Syslog: The Complete System Administrator Guide
- How To Install and Enable SSH Server on Ubuntu 20.04
What You Will Learn
If you follow this tutorial until the end, you will be able to learn about the following topics :
- How to install an OpenLDAP server on Debian 10;
- How to configure OpenLDAP and what the configuration actually means;
- How to use LDIF and LDAP utilities to modify your LDAP database;
- How to add users in your OpenLDAP server for central authentication;
- How to setup clients and how central authentication works on Linux;
That’s quite a long article so without further ado, let’s start by install a simple OpenLDAP server on Debian 10.
Install OpenLDAP server on Debian 10
Before starting, you should make sure that you have administrator rights on your system : you will need them to install new packages.
To check if you have sudo rights, execute the “sudo” command with the “-v” option.
$ sudo -v
If you are not sure on how to provide sudo rights for users on Debian 10 or CentOS 8, make sure to read our dedicated guides about it.
Also, make sure that your packages are correctly updated in order to get the latest package version from the repositories.
$ sudo apt-get update
On Linux, the OpenLDAP server is called “slapd“.
It is a simple and configurable stand-alone server that is used in order to read, modify and delete from a LDAP directory.
The slapd daemon also comes with many different utilities that can be used in order to create new entries easily, or to modify entries easily : slapadd or slappasswd just to name a few.
$ sudo apt-get install slapd
When installing this new package, you will be ask to configure the slapd daemon at the end of the installation.
Configuring slapd on Debian 10
The slapd configuration comes as text-based interfaces that you need to fill in order to setup the server properly.
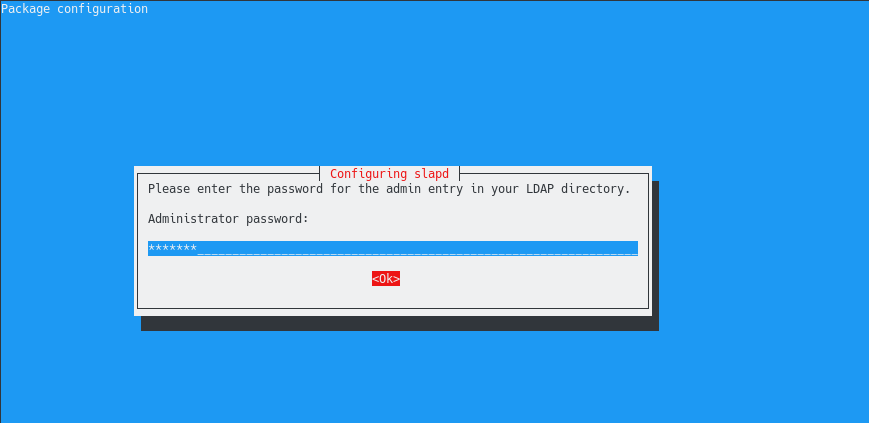
First, you are asked to provide an administrator password for the LDAP server.
Choose a secured password because the administrator entry in the LDAP directory has all the rights on the entire tree : add, delete and modify all the entries as well as reading all the LDAP attributes.
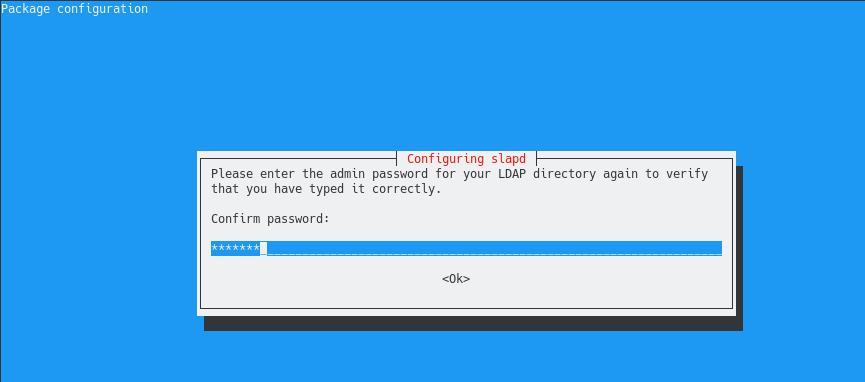
On the next screen, you are asked to confirm the password : simply type what you typed in the previous screen.
From there, your LDAP server should be initialized.
When installing the slapd server, the installation also :
- Created a user named “openldap” on your server;
- Created an initial configuration that is available at /etc/ldap
- Created an initial and empty database that is ready to accept new entries.
By default, the OpenLDAP server will create a first database entry that reflects your current domain name.
However, if you did not configure your domain name properly (during the installation for example), there is a chance that your OpenLDAP server is badly configured.
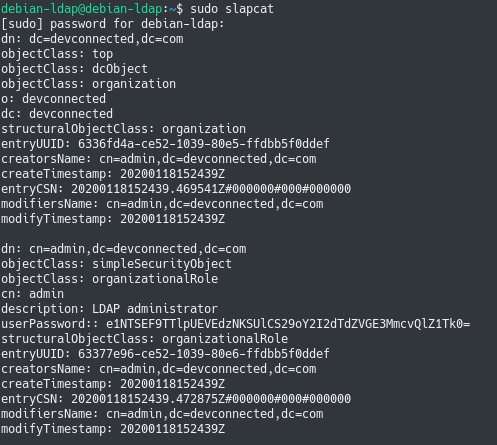
To take a first look at the initial configuration of your OpenLDAP server, use the “slapcat” command and watch for the distinguished names created by slapd.
$ sudo slapcat

$ sudo slapcat | grep dn
Usually, your OpenLDAP top DNs should match the DNS names of your domain.
It means that if you are currently working in the “devconnected.com” domain, your OpenLDAP server should have the “dc=devconnected,dc=com” top distinguished names.
As you can see, this is not the case for now but luckily for us there is a way to reconfigure the slapd daemon.
Reconfiguring slapd using dpkg-reconfigure
In order to reconfigure the slapd daemon, execute the “dpkg-reconfigure” command on the “slapd” daemon. Again, you need sudo privileges to reconfigure slapd.
$ sudo dpkg-reconfigure slapd
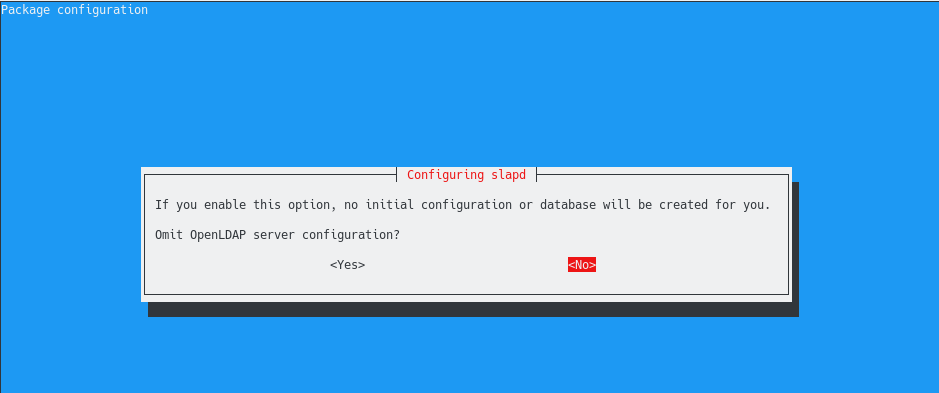
First, you are asked if you want to omit the OpenLDAP server configuration.
We obviously want to press “No” on this option because we want the initial configuration of the database to be created for us.
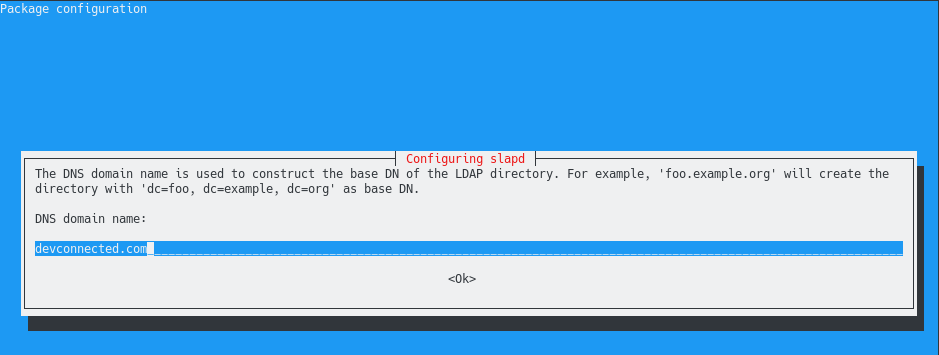
On the next step, you are asked to provide the base distinguished name of your LDAP server.
As you can see, the slapd daemon describes that the DNS domain name is used to build the base DN of your OpenLDAP directory.
In this case, we are choosing to have “dc=devconnected,dc=com” : note that you have to modify this entry to match your current DNS settings.
If you are not sure about the domain that you belong to, simply use the “domainname” command in your terminal.
$ domainname
devconnected.com
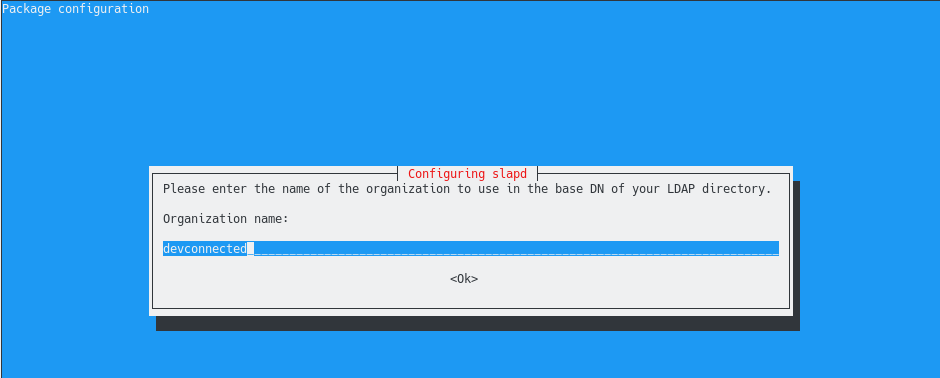
Next, you are asked to provide the name of your organization. This is exactly the same step as the one done before, simply type your organization name and hit “Ok”.
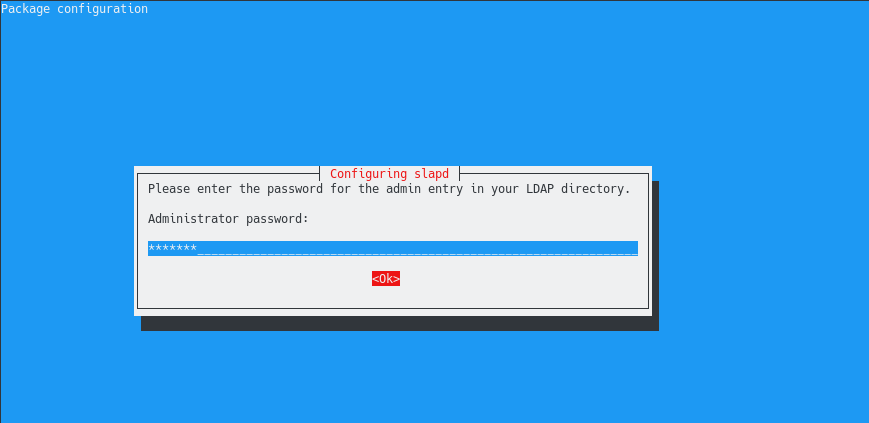
Finally, similarly to the first slapd configuration, you are asked to provide admin credentials for your LDAP server.
Again, choose a strong password as it can be used in order to read and modify every single entry in the LDAP directory.
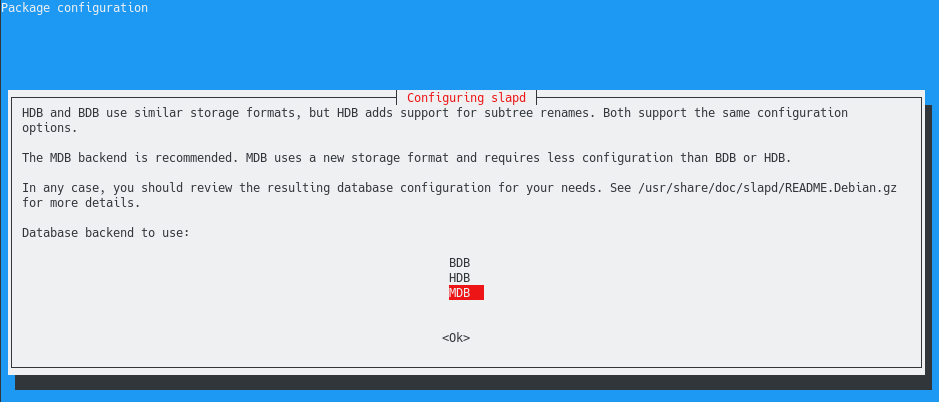
On the next screen, you are asked to provide the back-end to be used by LDAP.
For this step, you want to keep the default values (meaning a MDB for MariaDB back-end) unless you have a reason to choose another storage backend.
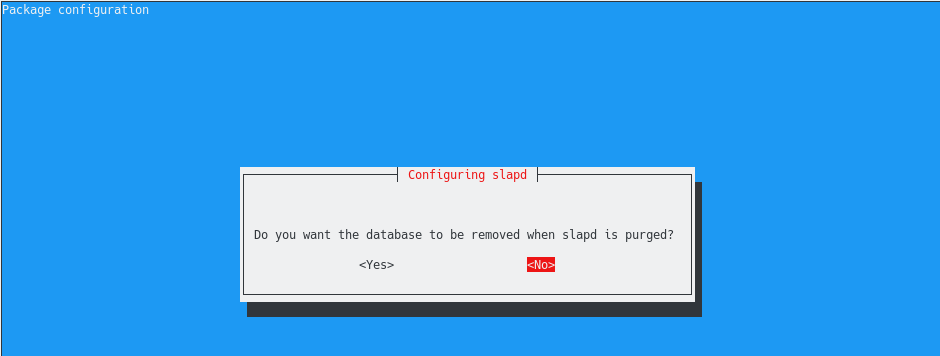
Next, you are asked if you want the database to be removed when slapd is purged.
In this case, we will choose “No” : there are many situations where you simply want to update your slapd package or switch to a different LDAP server.
If you choose yes, your database will be removed which can be a real problem if you don’t have any backups of your LDAP directory.
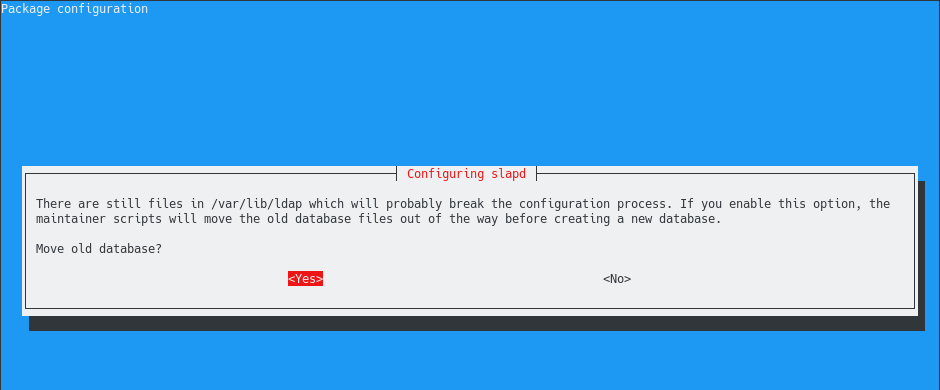
Finally, you are prompted with a warning : there are already some files sitting in the “/var/lib” directory of your server.
In this directory, you currently have your old database stored. As you are trying to reconfigure your OpenLDAP server, you will overwrite the content of this folder.
By choosing “Yes”, the slapd utility will backup the content of your existing database to the “/var/backups” folder.
Done!
Your slapd server is now configured properly to match your current DNS settings.
To have a first look at the content of your LDAP database, simply execute the “slapcat” (with sudo privileges if you are not currently logged as root)
$ sudo slapcat
With this initial setup :
- Your configuration files are stored in “/etc/ldap” : they are storing the ldap configuration file, the schemas that you can add to slapd, as well as the slapd.d directory used for server customization;
- Your database is stored at “/var/lib/ldap” under the “data.mdb” database : you should probably setup backups of this file in order to make sure that you won’t lose everything.
Configuring firewall rules for LDAP
If you are using a firewall, it is very likely that you will need to accept inbound requests to your LDAP server.
As a quick reminder, OpenLDAP runs on port 389.
To make sure that it is running correctly, run the “systemctl status” command on the “slapd” server.
$ sudo systemctl status slapd
If you are using recent distributions of Debian, you are probably using UFW as the default firewall.
To enable OpenLDAP on UFW, execute the “ufw allow” command on the port 389 of your server. You can accept TCP and UDP connections all together.
$ sudo ufw allow 389

Rule added
Rule added (v6)
You can then verify that the rule was correctly created using the status command.
In the next section, we are going to see how you can easily add new entries to your LDAP server using LDIF files.
Add OpenLDAP entries using LDIF files
When adding new entries to your OpenLDAP server, you could use the “slapadd” utility in order to add a new LDIF file.
However, this is not the utility that we are going to use, instead we are going to use “ldapadd”.
Difference between slapadd and ldapadd
Before adding new entries, it is important for you to know the difference between slap utilities and ldap utilities.
Both utilities take LDIF formatted files as an argument and they had the content to the database.
However, when using slapadd, you will have to restart your LDAP server for the changes to be applied.
This is not the case when using ldap utilities such as “ldapadd” : modifications are directly performed on the directory tree.
In order to be able to use “ldapadd”, “ldapsearch” and other LDAP utilities, you need to install the “ldap-utils” package on your system.
$ sudo apt-get install ldap-utils
Creating your first LDIF file
As explained earlier, if you are using the console line, you will need to create LDIF files and add them to your current LDAP configuration or database.
The LDIF format is a format used in order to add or modify existing entries in a LDAP directory.
Using LDIF, you specify the distinguished name of the node that you want to modify and you describe the modifications to be performed.
As an example, let’s say that you want to create a new node in your LDAP directory named “users”.
Adding a users group
To achieve that, create a new LDIF file named “users.ldif” and add the following content in it.
$ sudo touch /etc/ldap/users.ldif

# Content of the users file

dn: ou=People,dc=devconnected,dc=com
objectClass: organizationalUnit
ou: People
As you can see, we are provided the complete DN of the node to be added, we specify the object class and the name of the node to be created.
In order to add this entry to your LDAP directory, you have to use the “ldapadd” command and specify the LDIF file to be used.
$ sudo ldapadd -D "cn=admin,dc=devconnected,dc=com" -W -H ldapi:/// -f users.ldif

Enter LDAP Password:
added new entry "ou=People,dc=devconnected,dc=com"
If you are not familiar with ldap utility options, here is a description of the options provided :
- -D : used to specify a node to bind to. When adding new entries to a LDAP server, you can choose your authentication mechanism but you usually want to bind to the admin node in order to gain all privileges on the tree;
- -W : used in order to specify that we want the password to be prompted when connecting;
- -H : used in order to specify the LDAP server to connect to. In this case, we are connecting to a LDAP server available at localhost;
- -f : to specify the LDIF file to be added to the LDAP server.
Note that you can not use an external authentication in order to add new entries to LDAP by default : ACL are not configured to do that.
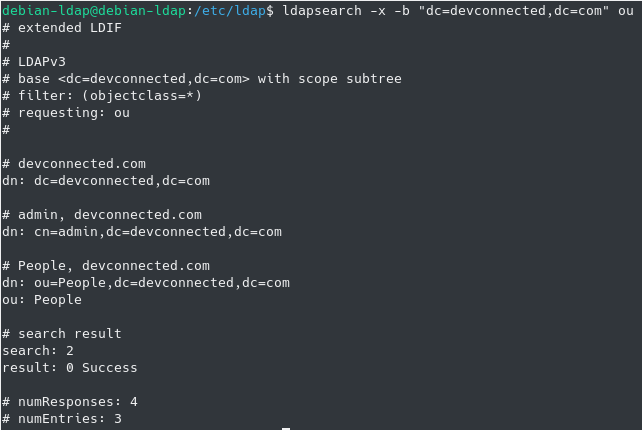
Now that your node is added to your tree, you can try to find it using the “ldapsearch” command.
$ sudo ldapsearch -x -b "dc=devconnected,dc=com" ou
Great!
Now that the “People” organizational unit was added, let’s add some users to your LDAP tree.
Adding new users to LDAP
In order to add new users, we are going to follow the same logic : creating a LDIF file containing individual entries for users.
As described before, OpenLDAP uses schemas in order to define “objects” that can be added to the directory.
In this case, we are going to use the “posixAccount” schema which is already added to your database configuration by default.
The “posixAccount” object has several fields that can be used to describe a Linux user account such as the username, the surname but most importantly the user password.
Create a new LDIF file and add the following content in it :
$ sudo touch /etc/ldap/new_users.ldif

# Content of new_users LDIF file

dn: cn=john,ou=People,dc=devconnected,dc=com
objectClass: top
objectClass: account
objectClass: posixAccount
objectClass: shadowAccount
cn: john
uid: john
uidNumber: 10001
gidNumber: 10001
homeDirectory: /home/john
userPassword: <password>
loginShell: /bin/bash
When you are done, save your file and use the ldapadd command in order to add your entry to the LDAP directory tree.
$ sudo ldapadd -D "cn=admin,dc=devconnected,dc=com" -W -H ldapi:/// -f new_users.ldif

Enter LDAP Password:
added new entry "cn=john,ou=People,dc=devconnected,dc=com"
Congratulations, you now have your first user stored in OpenLDAP.
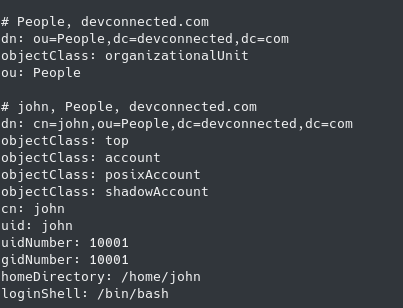
You can read the user information by issuing a LDAP search command. Note that you won’t be able to read the user password as you are restricted by ACLs.
$ sudo ldapsearch -x -b "ou=People,dc=devconnected,dc=com"
Awesome, now that your LDAP server is configured, let’s configure a client in order to configure central authentication.
Configuring LDAP clients for centralized authentication
In the last section of this OpenLDAP server setup, we are going to see how you can configure LDAP clients (i.e your host machines) in order for them to connect using LDAP information.
How LDAP client authentication works
Before issuing any commands, it is important for you to have a global understanding of what we are actually building.
Before LDAP (and NIS), if you wanted to configure users and group permissions over multiple computers of a network, you would have to connect to them one by one and change their settings.
LDAP comes as a great solution for this : LDAP will centralize user information in one single place on your network.
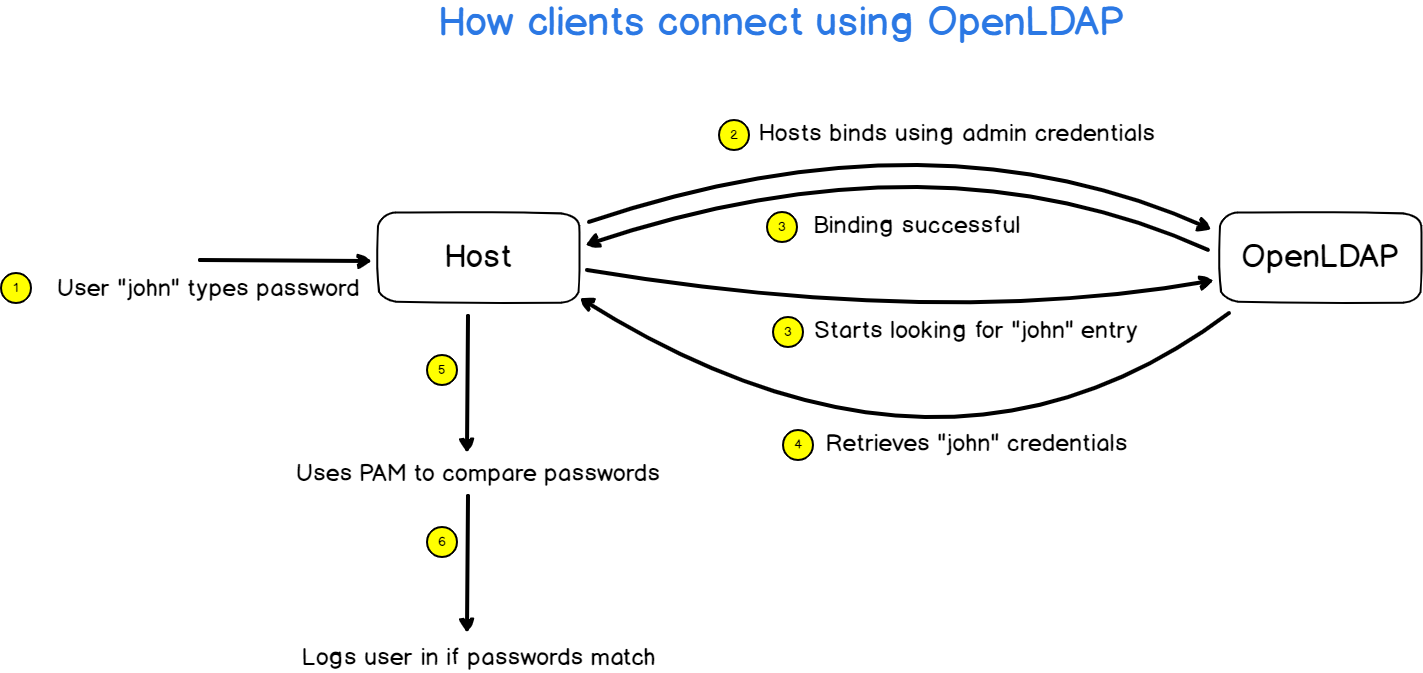
When a client connects to any machine of your domain, the host will first contact the LDAP server and verify that the user password provided is correct.
The client library will bind (or authenticate) to the remote LDAP server using the admin account and retrieve the information associated with the user trying to connect.
Next, it will retrieve the password associated with the account and compare it with the password you typed when you logged in.
If the passwords match, you will be logged in your account, otherwise you will be denied.
Setup Client LDAP authentication on Debian
In order to setup client LDAP authentication, you will need to install the “libnss-ldap” package on your client.
$ sudo apt-get install libnss-ldap
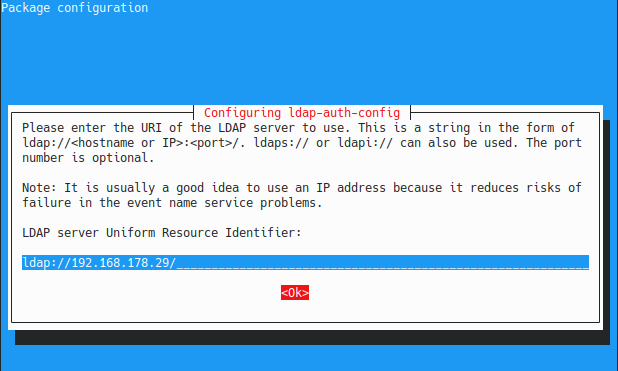
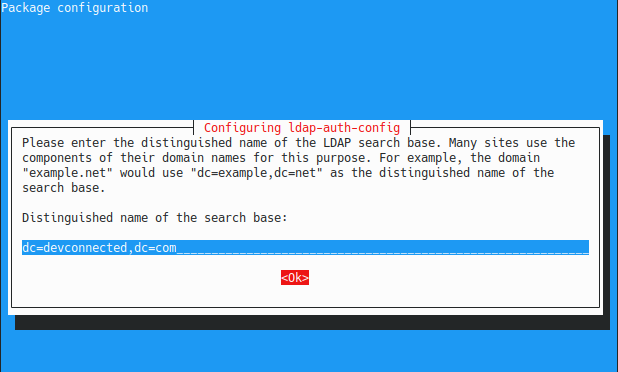
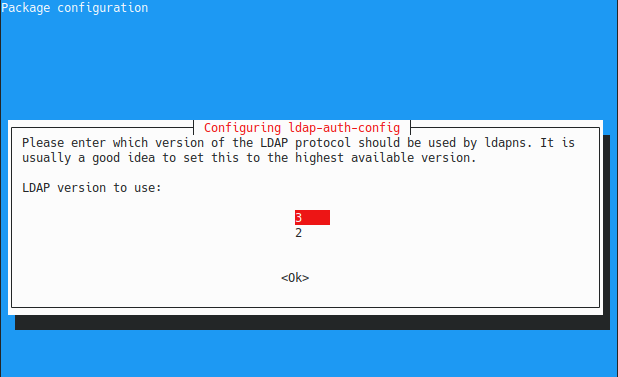
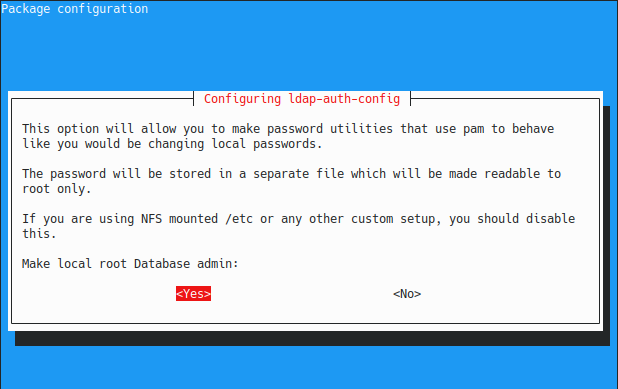
When installing this package, you will be prompted with many different questions in order to configure client centralized authentication.
First, you are asked to provide the URL of your LDAP server : it is recommended to setup an IP address (configured as static obviously) in order to avoid problems in DNS resolutions.
On the server, identify your IP address with the ip command and fill the corresponding field on the client.
# On the server

$ ip a
Note : make sure that you are using the LDAP protocol and not the LDAPI protocol. For some reason, your server won’t be reachable if you use the LDAPI protocol.
Next, you are asked to provide the root distinguished name of your LDAP server. If you are not sure, you should run a ldapsearch command on the server to get this information.
On the next screen, you are asked the LDAP version that you want to use : choose the LDAP version 3 for now.
Next, you are asked if you want to make the local root the database admin.
You want to type “Yes” to this option as you want to change the user password directly from the host machine.
With this option, you will be able to run the “passwd” and have the password modified directly in the LDAP directory, which is pretty useful.
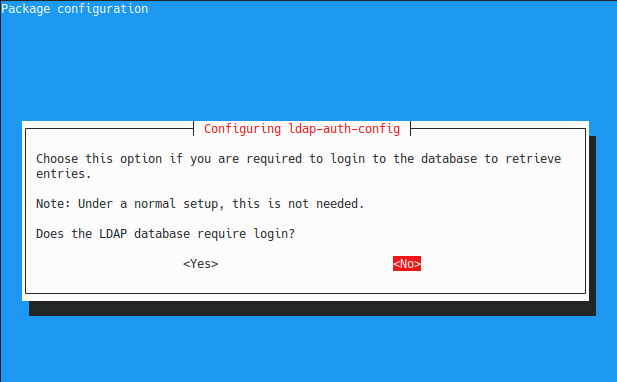
By default, the LDAP database does not require a login, so you can type “No” on this option.
Note : the LDAP database has no login but you have an admin account at the top of your LDAP directory. Those are two different concepts that are very different one from another.
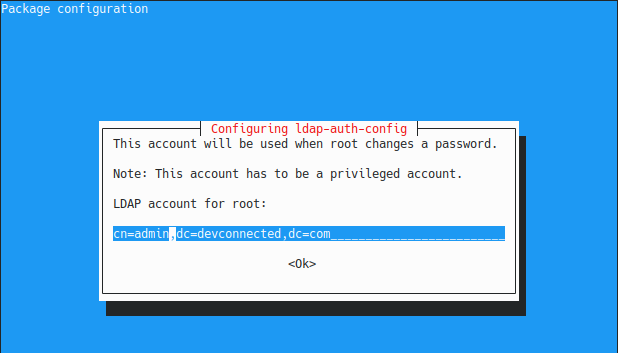
Next, type the LDAP administrator account to be used for bindinds.
As a reminder, this is the account that will be used in order to get the user password information from the server.
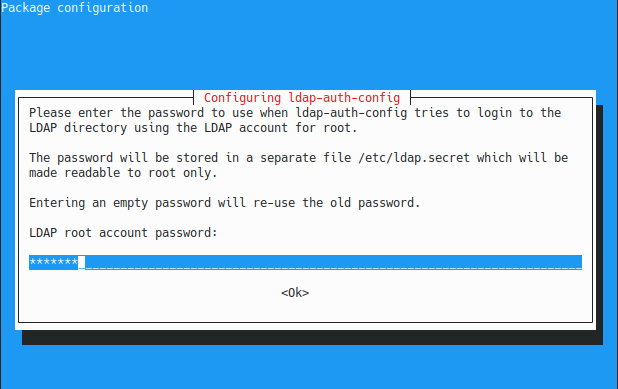
Finally, type the password associated with the admin account on the LDAP server.
Done, you should now be able to query your LDAP server.
Linking client information to LDAP
In order to link your client information (such as username and password) to the LDAP directory, you need to modify the nsswitch file.
As a reminder, the nsswitch file is used in order to link some information on your system (such as users, groups or hosts) to various different sources (local, LDAP, NIS or others).
Edit the /etc/nsswitch.conf file and add a “ldap” entry to the first four sections : passwd, group, shadow, gshadow.
$ sudo nano /etc/nsswitch.conf
Save your file and you should now be able to list users from the LDAP server.
$ getent passwd
Note : if you are not familiar with the getent command, here are all the commands used to list users on Linux.
Awesome!
Now that your user can be retrieved via LDAP, you will be able to log to this account by using the user password you have specified in the LDAP directory.
$ su - john

<Type password specified in LDAP>

john@client:/home/john
Conclusion
In this tutorial, you learnt how you can easily setup a simple OpenLDAP server on Debian 10 using the slapd utility.
You also learnt about the LDAP utilities that you can use in order to add and search entries in your LDAP directory.
Finally, you have seen how you can configure client machines in order to use LDAP authentication to connect to your machines.
This is an architecture that can be used in most company IT architecture : note that you will have to setup TLS encryption in order to passwords not to be transmitted over the network in clear text.
If you are interested in Linux System administration, we have a complete section dedicated to it on the website, so make sure to check it out!
